|
Stained Glass - Time To Get The Lead Out!
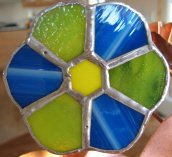
If you are wanting to make an abstract work of art, you can begin by breaking some glass and then like a puzzle fitting the bits together until in your mind you have created your masterpiece!
The alternative is to purchase or create your own pattern. I have done both with great results. You can purchase patterns at your local stained glass supply shop or on-line. But, the most fun is making your own design and cutting out your own pattern. Take a sheet of heavy paper, large enough to contain your creation, and freehand your design onto it. Remember, there are no limits!
Once your design is on paper, you are ready to cut it out. But, here are some thoughts. Before cutting out I like to do a little coloring, with crayons or colored pencils, to help me see the final work of art in my mind. I also number the pattern pieces in a clockwise fashion to help me put it back together once it is cut apart. Also, when cutting the glass, I put the number on the glass piece to help reduce my confusion. You may not be as easily confused as I get and skip this part!
So now you have your pattern all cut out. What next? Well we have to pick out our glass. Here is where the artist in you steps in. Art glass comes in a huge number of patterns and colors. First thing I do is check my glass on hand. See if you can use any of what you have before heading off to purchase. A quick tip, when you do your projects hang on to all of the left overs as many times they will be used later.
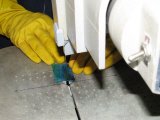
Unless you are blessed with a large inventory of glass, it is likely time to head to the art glass store. There you will find helpful people and likely any color and pattern of glass you want. Choose wisely, don't rush, after all you want your creation to be perfect. One point to discuss with the sales person. In my experience some glass cuts easily with a glass cutter while some really need to be cut with a glass saw. Some wavy types of glass seems to want to go its own way when breaking, while others will follow a score line very well.
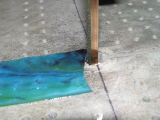
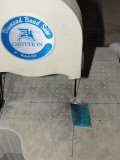
A glass band saw is a great tool and I highly recommend it if you are going to do more than a few small projects. But, it is a bit of an investment at about $300 to $400. You will also want to pick up a glass edge grinder which are around $150. This is not to say you can't have great results with just a simple glass cutter and a growser pliers. But practice on some old window glass before breaking up your more expensive art glass. Ask the person at the stained glass supply store for a quick glass cutting lesson.
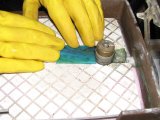
Before leaving cutting, a quick tip. When you mark your glass for cutting you will likely use a paint pen or felt tip marker of some sort. When using a water cooled saw or grinder, these marks will just float loose and disappear. Really frustrating! The lady at my stained glass supply store suggested rubbing lip balm or chapstick over the line. She was right! It usually lasts long enough to finish the cut.
So now you have the pieces all cut out and the pattern fit together. We will have had to make another decision by this point. Copper foil or lead came to join the pieces together. Since you are likely a beginner at this point, I highly recommend copper foil. It is easy, low cost and very forgiving.
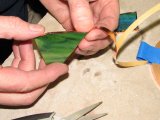
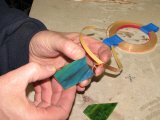
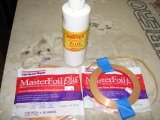
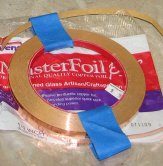
The idea with copper foil is to cover every glass edge with a strip of adhesive backed copper foil. You decide on the width of foil to use by measuring the glass thickness and how much foil, and therefore solder, you want on each of the glass faces. The foil is applied so that it covers the edge and folds over a small amount onto the glass face. Makes sort of a square “U” shape. As you complete the foil application on each piece, lay it down and using a round edge tool rub all the foil edges so they are flat and well adhered to the glass at all points.
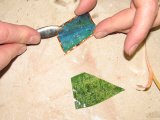
Here is a little tip. I purchased a sheet of water proof floor under-layment from the home improvement store and cut it to fit my work bench surface. This is the really hard stuff. I think it is called hardbacker. This stuff is heat proof and the solder will not hurt it or soak through. As each piece of glass is finished, I lay it in place. When all pieces are in place it can be fluxed and soldered without picking it up or moving it. You don't have to worry about damaging your work bench surface!
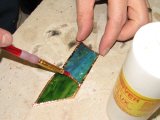
With all the stained glass pieces in final position, the next step is to apply some flux to the copper foil. I like the really liquid stuff, but you can use most any kind of solder flux, even the plumbing stuff you can get at the home improvement store. If you check out the photos you will see what I like. I use a small artist brush which I dip into the flux and then brush all the copper foil joints very lightly. It really takes very little flux. If you get too much, you will see the solder spit as the flux boils out of the joint. Too little and the solder will not want to flow or stick to the copper foil. Pretty simple!
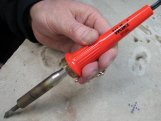
Now for the fun part, lets do some soldering! By this time you will have obtained a soldering iron. I recommend one with at least 75 watts of heating power. You will also need some solder. I recommend a 50/50 blend solder. Now this stuff contains lead so as you work with it, either wear gloves or wash your hands before eating, drinking or putting your hands to your face. Needless to say, don't let your kids play with it. It is safe if you use these simple precautions.
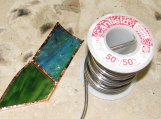
Once the soldering iron is hot you can melt a little solder on to it. If the iron has been used previously, you will want to wipe the hot tip with a dry rag. As the iron sits between uses the remaining solder will form a hard crusty oxidized surface. This will make it hard for the new solder to melt and just generally gets in the way. When you wipe the tip with the rag, it will look shiny and bright. Now you are ready.
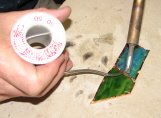
I like to start by spot welding all of the stained glass pieces together. With some solder melted on the tip of the soldering iron, just lightly touch the copper foil joint. You will see the solder quickly flow into the joint. Repeat this for all of the foil joints. You can also lay the end of the solder onto the foil joint and simply bring the soldering iron down on top of it. Once all of the joints have been spot welded I like to carefully pick the glass up and turn it over. Then do the back side completely. Unless it is a piece that will be seen from both sides, or your a perfectionist, I may do a less than perfectly formed solder bead on the back side.
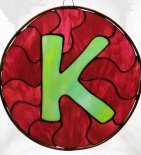
Once the back side of your stained glass creation is done completely turn it over and solder the front side. This is where I really focus on getting the solder bead smooth and uniform in size. All I can say is practice will make it perfect. How you hold the solder and soldering iron will effect the ease at which you get that perfect finish. You can always just run your soldering iron over the joint again to level or smooth it out. Don't be afraid of it.
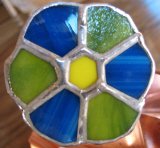
We are just about done! Once cooled I give the stained glass piece a good soapy water wash by using a very soft brush and a bowl of soapy water. Then spray rinse it. This gets all the excess flux and other marks off the glass and solder. Use a soft towel to dry it off.
If you are making stained glass to hang in the window or other place, you can add hanging loops by simply soldering some copper wire anyplace along a copper foil joint or even the outside edge.
There you are, thats all there is to it! Have fun, it is a wonderful hobby.
Some Other Stained Glass Resources to Help You Get Started:Stained Glass Association of America
Return from Stained Glass to Crafts Part 2 Page
|
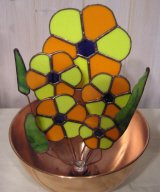 Working Stained Glass is in some ways like doing a jigsaw puzzle, at least when you are in the early stages of the process. Why is that you ask? Let me explain.
